
Commercial window installation involves more than fitting a window into an opening. It requires accurate measurements, compatible window systems, secure anchorage, effective weatherproofing, and coordination between the window supplier and construction team. Understanding these requirements helps contractors and project managers reduce installation errors, avoid delays, and achieve the required building performance.
This guide covers the main types of commercial windows, pre-installation planning, installation procedures, applicable requirements, cost factors, and final inspection considerations for projects in the United States.
1. What Is Commercial Window Installation?
Commercial window installation is the process of integrating windows or glazing systems into commercial buildings, such as offices, retail stores, hotels, schools, healthcare facilities, and industrial properties.
Unlike many residential window projects, commercial installations may involve larger openings, multiple window units, specialized framing systems, performance specifications, and coordination with other building components.
The installation approach depends on the building design and the selected system. A storefront window, for example, has different structural and installation requirements from a punched window installed within a conventional wall opening.
Commercial window installation generally falls into two categories:
- New construction: Windows are installed as part of the original building envelope, coordinated with framing, waterproofing, insulation, and exterior finishes.
- Commercial window replacement: Existing windows are removed and replaced. The work may require additional preparation to address deteriorated frames, damaged substrates, occupied spaces, and existing finishes.
The first step is to identify the window system, project conditions, and required performance before planning the installation.
2. Types of Commercial Windows and Glazing Systems
Choosing the correct system is essential because window configuration affects installation methods, structural support, weatherproofing, and project coordination.
Storefront Windows
Storefront systems are commonly used at ground-level retail spaces, entrances, and commercial facades. They typically combine framed glazing with entrance doors or other storefront components.
Installation planning should account for opening dimensions, frame alignment, anchorage, sill conditions, and connections to the surrounding wall. Storefront systems should be selected according to their intended application and specified performance requirements.

Curtain Wall Systems
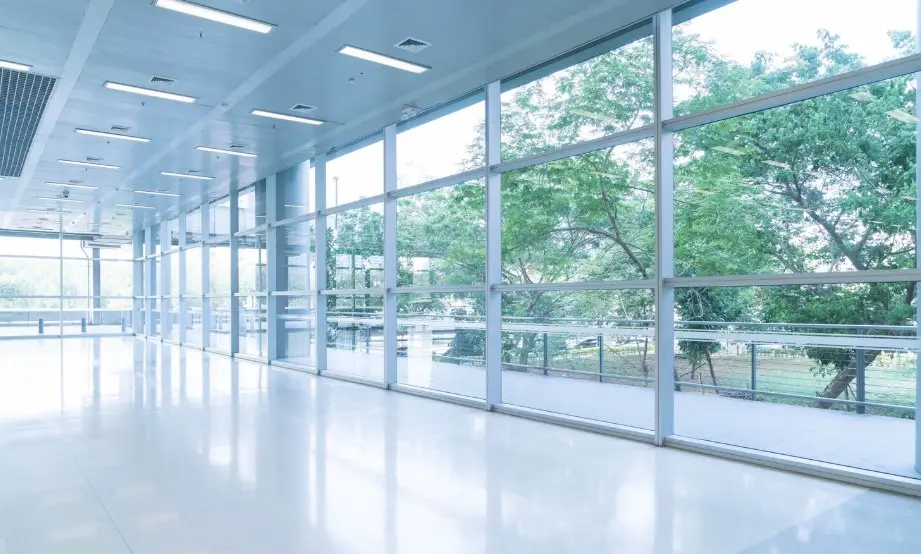
Curtain wall systems form a non-load-bearing exterior wall, typically attached to the building’s structural frame. They are often used in office buildings, hotels, and other commercial developments with extensive glazed facades.
Depending on the design, curtain walls may use unitized or stick-built construction. These approaches differ in fabrication, delivery, assembly, and installation sequencing. Structural connections, movement allowances, drainage, and perimeter interfaces must be coordinated with the project design.
Curtain walls are not simply larger storefront windows. They require system-specific engineering and installation procedures.
Punched Windows
Punched windows are installed within individual openings in a wall. They are common in offices, schools, hotels, apartment buildings, and other structures where windows are separated by solid wall sections.
Installation involves checking the rough opening, positioning and securing the frame, and integrating the window with the surrounding air and water control layers. The specific details depend on the wall assembly and window design.

Fixed and Operable Commercial Windows
Fixed windows provide daylight and views without opening for ventilation. Operable windows allow controlled airflow and may be specified where natural ventilation or occupant operation is required.
Both types must meet the project’s requirements for thermal performance, air and water resistance, safety, and durability. Operable units also require appropriate hardware, clearances, and functional testing.

3. What to Check Before Commercial Window Installation
Thorough pre-installation planning helps prevent dimensional conflicts, product mismatches, and costly field modifications.
Verify Window Dimensions and Rough Openings
Confirm the window schedule, approved drawings, opening dimensions, and installation clearances before installation begins. Measurements should account for the specified frame dimensions, required tolerances, and the details of the selected installation system.
Do not assume every rough opening is square, level, or plumb. Existing buildings may have dimensional variations or concealed damage that must be addressed before the windows are fitted.
For replacement projects, inspect the existing frames, surrounding materials, and concealed conditions where accessible. Any discrepancy that affects installation should be resolved before proceeding.
Review Drawings and Product Specifications
The approved submittals and project documents should identify the required window types, sizes, frame materials, glazing configurations, hardware, finishes, and performance criteria.
Depending on the project, the documentation may also include shop drawings, anchorage details, installation instructions, test reports, and information about interfaces with adjacent building components.
Confirm that the supplied products match the approved specifications. Substituting a different window configuration or glazing option without review may affect compliance and coordination with the rest of the building envelope.
Check Structural Support and Substrate Conditions
The wall opening and supporting structure must be suitable for the selected window system. Review the specified attachment points, substrate condition, and connection details before installation.
Large or heavy glazing systems may require specialized lifting equipment, temporary support, or coordinated installation sequences. Structural connections should follow the approved design rather than relying on improvised field fixes.
Coordinate Delivery and Site Access
Commercial projects may involve hundreds of windows delivered in multiple batches. Confirm delivery dates, unloading arrangements, storage conditions, lifting requirements, and the order in which units will be installed.
Windows should be protected from damage, excessive moisture, and contamination during storage. Clear labeling and an organized delivery schedule help reduce handling errors and prevent products from arriving too early or too late for the construction sequence.
Review Building Codes and Safety Requirements
Before work begins, determine which state and local building codes and project-specific requirements apply. Requirements may vary by building use, occupancy, location, window height, glazing type, and exposure conditions.
The project team should also confirm applicable safety glazing provisions, fall-protection requirements, worker access, and any required inspections or documentation.
4. Commercial Window Installation Process: Step by Step
The following steps describe a general workflow for commercial window installation. Actual procedures vary by system, wall construction, manufacturer instructions, and approved project details.
Step 1. Inspect and Prepare the Opening
Inspect the opening for dimensional accuracy, structural readiness, debris, moisture, and damage. Verify that the supporting surfaces and attachment locations meet the approved installation requirements.
Correct any unacceptable conditions before positioning the window. Installing a unit into an unsuitable opening can lead to alignment problems, poor sealing, or unnecessary stress on the frame.
For new construction, coordinate the opening with the surrounding wall and its water, air, and thermal control layers. For replacement work, establish how the existing window will be removed and how the exposed opening will be protected.
Step 2. Position and Align the Window System
Place the window in the designated opening using the handling equipment and procedures appropriate for its size and weight.
Check the frame for level, plumb, square, and alignment with the approved drawings. Verify the specified clearances and support points before final fastening.
The window should not be forced into an opening that is too small or distorted. Improper positioning can affect operation, glazing integrity, frame performance, and the durability of perimeter joints.
Step 3. Secure the Frame According to Specifications
Install anchors, fasteners, clips, or other connections specified for the selected window system and supporting structure.
Fastener type, spacing, embedment, edge distances, and installation sequence should follow the approved details and manufacturer instructions. Different substrates and framing systems may require different attachment methods.
Avoid over-tightening fasteners or introducing unintended loads into the frame. The installation must also accommodate any movement allowances required by the design.
Step 4. Install Flashing and Weatherproofing Components
Integrate the window with the surrounding wall’s water-management system. Depending on the wall assembly, this may involve sill flashing, jamb and head flashing, drainage provisions, end dams, or other specified components.
The sequence and overlap of these materials are important. Flashing should direct water toward the exterior rather than allowing it to collect within the wall or around the window opening.
The correct details depend on the window system and the wall’s water-resistive barrier. A generic flashing detail should not replace the approved project-specific design.
Step 5. Complete Air Sealing and Perimeter Joints
Install the specified sealants, backer rods, gaskets, or other sealing components at the required interfaces.
Perimeter joints must be compatible with the adjacent materials and designed to accommodate expected movement. Surface preparation, joint dimensions, sealant application, and curing conditions can all affect long-term performance.
Air sealing and water management are related but distinct functions. A bead of sealant alone does not necessarily provide a complete weatherproofing strategy if the system also requires drainage or flashing.
Step 6. Finish the Installation and Check Operation
Complete the specified interior and exterior finishes without obstructing drainage paths or damaging seals and coatings.
For operable windows, check opening and closing, locking hardware, alignment, and clearances. Inspect fixed units for visible damage, glazing condition, and compliance with the approved configuration.
Document deficiencies and correct them before the installation is accepted. Depending on project requirements, additional inspections or performance testing may be necessary.
5. Commercial Window Installation Requirements
Installation quality affects whether a commercial window system performs as intended. Several requirements deserve particular attention.
Structural Anchorage and Frame Support
Anchorage must transfer the required loads to the supporting structure. The connection design should account for applicable wind loads, system configuration, substrate conditions, and any other project-specific structural requirements.
The installer should follow approved drawings and installation instructions. Changes to attachment details should be reviewed by the responsible design professional when required.
Water Management and Weather Resistance
Windows are part of the building envelope, so their interfaces with the surrounding wall must control water entry and provide the drainage paths required by the system.
Flashing continuity, sill detailing, perimeter joints, and connections to the wall’s water-resistive barrier are critical. Poorly coordinated interfaces can lead to water intrusion, damaged finishes, and deterioration of surrounding materials.
Air Leakage and Thermal Performance
The specified window performance should match the building’s energy and comfort requirements. Relevant criteria may include U-factor, solar heat gain coefficient (SHGC), air leakage, and other ratings required by the project.
The appropriate values depend on climate zone, building type, applicable energy code, and project specifications. Installation must preserve the intended performance by maintaining proper alignment, seals, and connections to the surrounding envelope.
A high-performance window cannot compensate for every defect in the installed assembly. Gaps, damaged seals, and poorly integrated perimeter details can undermine overall performance.
Safety Glazing and Applicable Building Codes
Certain locations and applications require safety glazing under applicable building codes. Requirements depend on factors such as glazing location, proximity to doors, impact exposure, and the building’s use.
Other project-specific provisions may address wind resistance, accessibility, fire-related conditions, or energy efficiency. Requirements should be confirmed with the design team and relevant local authorities rather than assumed to be identical across all US projects.
Manufacturer Installation Instructions
Every window system has its own installation requirements. These may specify approved fasteners, sealants, clearances, support conditions, glazing procedures, and limitations on field modifications.
Follow the instructions and approved project documents for the exact product supplied. Deviating from them without authorization may compromise performance, product warranties, or compliance with project specifications.
6. How Much Does Commercial Window Installation Cost?
Commercial window installation costs vary significantly by project. A reliable estimate should separate the cost of the window products from labor, equipment, preparation, and other construction work.
Window Type, Size, and Frame Material
The window system is one of the main cost factors. Standard punched windows, storefront systems, and curtain walls differ in framing, fabrication, assembly, and installation requirements.
Larger or custom-sized units may require additional engineering, special handling, or more complex installation sequences. Frame material, finish, configuration, and hardware also affect the product price.
Glass Specifications and Performance Requirements
Glazing options influence both product cost and handling requirements. Insulating glass units, laminated glass, tempered glass, coatings, and other specialized configurations may be specified to meet particular safety, thermal, acoustic, or solar-control requirements.
The correct comparison is based on the project’s required performance and approved specifications, not simply on glass thickness or the lowest initial price.
Labor, Equipment, and Site Accessibility
Installation labor depends on unit size, system complexity, site conditions, and the experience required for the work.
Upper-floor installations may require cranes, hoists, scaffolding, or specialized access equipment. Limited site access, occupied buildings, restricted working hours, and difficult lifting conditions can increase installation costs.
New Construction vs. Window Replacement
New construction generally allows window installation to be coordinated with the original building sequence. Replacement projects may involve removing existing units, protecting occupied areas, repairing damaged openings, disposing of old materials, and restoring interior or exterior finishes.
The extent of this additional work depends on the existing building and the chosen replacement method.
Freight, Removal, and Additional Building Work
A complete project estimate should identify freight, unloading, storage, waste disposal, opening repairs, perimeter finishing, testing, and any required temporary protection.
For projects involving large quantities of windows, delivery scheduling and packaging can also affect handling costs and labor efficiency.
To compare quotations accurately, confirm that each estimate covers the same window specifications, installation scope, equipment, preparation work, and inspection requirements. A lower product price does not necessarily mean a lower total installed cost.
7. Common Commercial Window Installation Problems
Several recurring problems can affect installation quality, project schedules, and long-term performance.
Incorrect Measurements or Incompatible Openings
Dimensional errors can prevent a window from fitting correctly or leave insufficient space for required installation details. Verify measurements and resolve discrepancies before installation rather than relying on extensive field modifications.
Poor Flashing and Perimeter Sealing
Discontinuous flashing, incorrectly sequenced materials, incompatible sealants, and poorly prepared joints can create paths for water entry. Inspect the interfaces with the wall assembly, not just the visible exterior sealant.
Improper Anchorage or Frame Alignment
Incorrect fasteners, missing connections, excessive tightening, or misaligned frames can affect structural performance and window operation. Installation should be checked against the approved details throughout the process.
Product Specifications That Do Not Match Project Requirements
A window may fit the opening but still fail to meet the project’s required thermal, safety, acoustic, or structural performance. Confirm product documentation and approved submittals before delivery and installation.
Delays Caused by Incomplete Coordination
Missing drawings, late deliveries, unresolved opening conditions, and conflicts with other trades can disrupt installation schedules. Clear responsibilities and early coordination between the supplier, contractor, and installation team help reduce these risks.
8. Commercial Window Installation Inspection Checklist
A final inspection should verify that the completed installation matches the approved documents and applicable requirements.
Use the following checklist as a starting point, adapting it to the project and window system:
- Confirm the installed window types, dimensions, glazing, and finishes match the approved specifications.
- Check frame alignment, required clearances, and visible signs of damage.
- Verify anchorage and fastener installation against the approved details where accessible.
- Inspect flashing, drainage provisions, and integration with the surrounding wall.
- Check perimeter sealants, gaskets, and joints for continuity and workmanship.
- Operate movable windows and test locks and hardware.
- Confirm that drainage paths and weep openings have not been blocked.
- Review required product documents, inspection records, and test results.
- Record deficiencies, complete corrective work, and arrange any required follow-up inspections.
Visual inspection alone may not verify every performance requirement. Where the project specifications call for field testing or other formal verification, those procedures should be completed by qualified personnel using the applicable methods.
9. FAQs
How long does commercial window installation take?
The schedule depends on the number and size of windows, the selected system, site access, opening readiness, and installation complexity. A project involving many standardized windows may follow a different schedule from one requiring large glazed assemblies or extensive replacement work. Delivery coordination and inspections should be included in the overall timeline.
Can commercial windows be installed while a building is occupied?
Yes, some projects can be completed while the building remains occupied, but the approach depends on the scope of work and site conditions. Planning may need to address work zones, occupant protection, weather exposure, noise, security, and temporary closures. The contractor should establish a suitable sequence and communicate disruptions in advance.
What is the difference between commercial window installation and replacement?
Commercial window installation usually refers to fitting windows into a new building or prepared openings. Replacement involves removing existing windows and integrating new units into an existing structure. Replacement may require additional investigation, repairs, protection of occupied spaces, and restoration of surrounding finishes.
Who is responsible for commercial window installation?
Responsibilities vary by contract. A window manufacturer or supplier may provide products, technical documentation, and installation guidance, while a general contractor or specialist installer manages on-site work. The project team should clearly define responsibility for measurements, opening preparation, installation, weatherproofing, inspections, and corrective work.
What should be confirmed before ordering commercial windows?
Confirm the approved dimensions, window configurations, frame and glass specifications, performance requirements, finish selections, hardware, installation details, delivery schedule, and project documentation. Requirements should be coordinated with the construction drawings and the team responsible for installation before production and shipment.
Conclusion
Successful commercial window installation depends on selecting the appropriate system, preparing the openings correctly, following approved installation details, and verifying the completed work. Early coordination between the window supplier, design team, contractor, and installer helps reduce avoidable delays and supports the required building performance.
For commercial projects, choosing windows that match the building design and project specifications is an important first step toward a reliable installation.
Planning a commercial window project? Email us at wang@gddlsn.com to discuss your window specifications, configurations, and project requirements.